Puck is the open-source visual editor for React that you can embed in any application to create the next generation of page builders and no-code products. Give us a star on GitHub! ⭐️
Headless CMS platforms like Contentful have changed how we think about content management. Instead of locking you into a specific frontend, like traditional CMSs do, they let you store structured content and deliver it anywhere—websites, mobile apps, even IoT devices.
But that flexibility comes with a trade-off: you don’t really know how your content will be presented. Unlike traditional CMSs that include WYSIWYG editors, headless CMSs require developers to build the frontend experience from scratch. This means content teams often need to rely on engineers just to tweak layouts, adjust styling, or add new sections to pages.
What’s the solution to this? A dedicated page builder. A good page builder gives content teams the freedom to structure pages visually, while still keeping the content store separate, ensuring that every component in the system remains dynamic and modular. There are plenty of proprietary ones out there, but if you want full control over your tech stack, a CMS-agnostic page builder is the way to go.
That’s where Puck comes in. Puck is a flexible, open-source page builder that you can embed directly into your React app. It’s completely unopinionated about how you store and retrieve content, making it compatible with virtually any backend (not just CMSs), including Contentful. This makes it a great fit if you want a dynamic editor that doesn’t tie you to a single platform.
In this tutorial, I’ll show you how to integrate Puck with Contentful to bridge the gap between reusable structured content and a user-friendly page-building experience. By the end, you’ll learn how to:
- Set up a React project with Puck
- Connect it to Contentful to import your content (blog posts)
- Build and publish pages directly within Puck so they can be rendered in your application
By the time we’re done, you’ll have a fully functional visual editor + headless CMS setup where users can write blog posts and build and edit pages dynamically—without writing a single line of code:
Before we get started, I’ll assume you have a basic understanding of Contentful. If you’re new here, no worries—you’re welcome to follow along! However, I’d recommend checking out the Contentful developer portal first to get familiar with the basics.
Table of Contents
- Set up Contentful
- Add Puck
- Connect Puck with Contentful
- Edit and Publish your Pages
- Taking your Page Builder Further
📝 1. Set up Contentful
To begin, we need to define our content structure in Contentful. Since this tutorial focuses on integrating a page builder rather than setting up Contentful from scratch, I’ll keep this section brief. If you’re new to Contentful, I recommend checking out their official getting started guide to get familiar with creating spaces, content types, and obtaining your API keys.
For this simple blog app, you only need to define a single content type named Blog, which represents the collection of blog posts you’ll publish and manage in your app. Here are the fields you should add to it:
Title: A required text field for the blog post titleBody: A required rich text field for the blog content
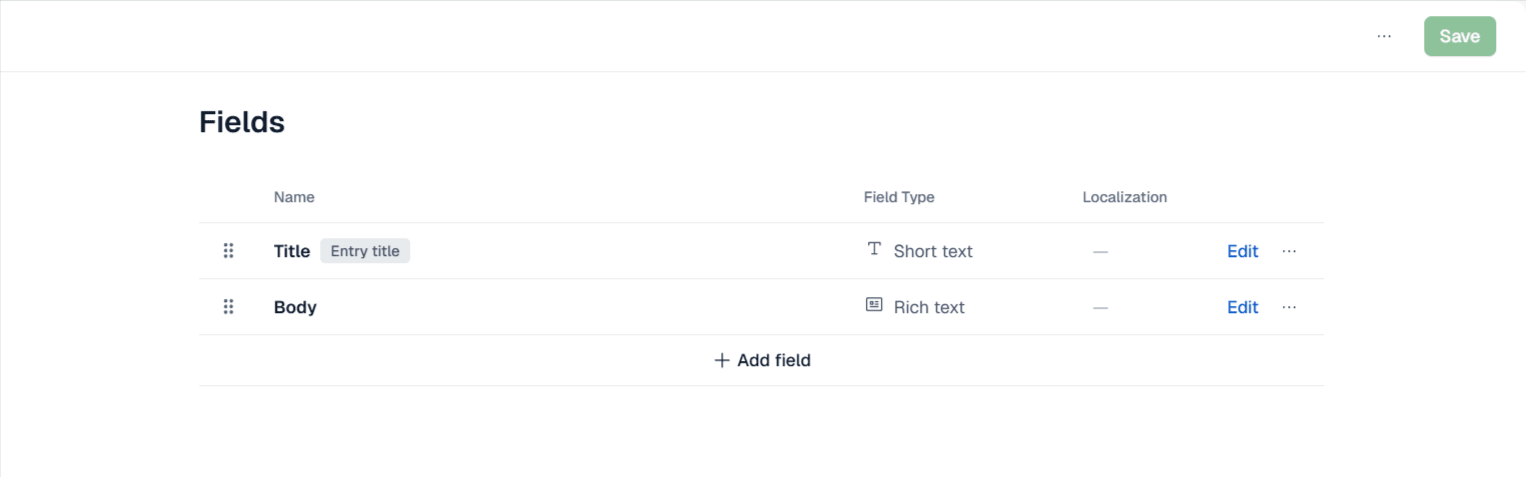
Once you create that content type you’ll be able to navigate to the “Content” section of your Contentful space to create new Blog posts based on this model:
👩💻 2. Add Puck
After setting up Contentful, we can now set up the web application to build and render pages with our content. To do this, we’ll use Puck both for page building and rendering.
If you’re completely new to Puck and want a broader introduction before diving in, check out our Getting Started guide.
Installing Puck
If you’re adding Puck to an existing project, you can install it with npm:
npm install @puckeditor/coreOr, if you’d rather start fresh, you can use one of the Puck recipes to quickly set up a new project:
npx create-puck-app my-blogThis will create a new Puck project named my-blog (feel free to rename it). After running the command, you’ll be prompted to choose a recipe—type next for the Next.js recipe or remix for the Remix recipe.
For this guide, I’ll assume you’ve used the generator and chosen the Next.js recipe, however if you’re integrating Puck into an existing project, the next steps should still apply. Puck works with any React application, so you might just need to tweak file names and folder structures based on your preferred setup.
Running Puck
Once Puck is installed, you can start your development server. To do this run the following commands:
# Navigate to your new project
cd my-blog

# Run the application
npm run dev
This will start a local development server on http://localhost:3000. If you navigate to it, you’ll be shown a sample message that will prompt you to navigate to the editor. To access the Puck editor, head over to: http://localhost:3000/edit
You should now see the Puck editor, rendering a single component: HeadingBlock.
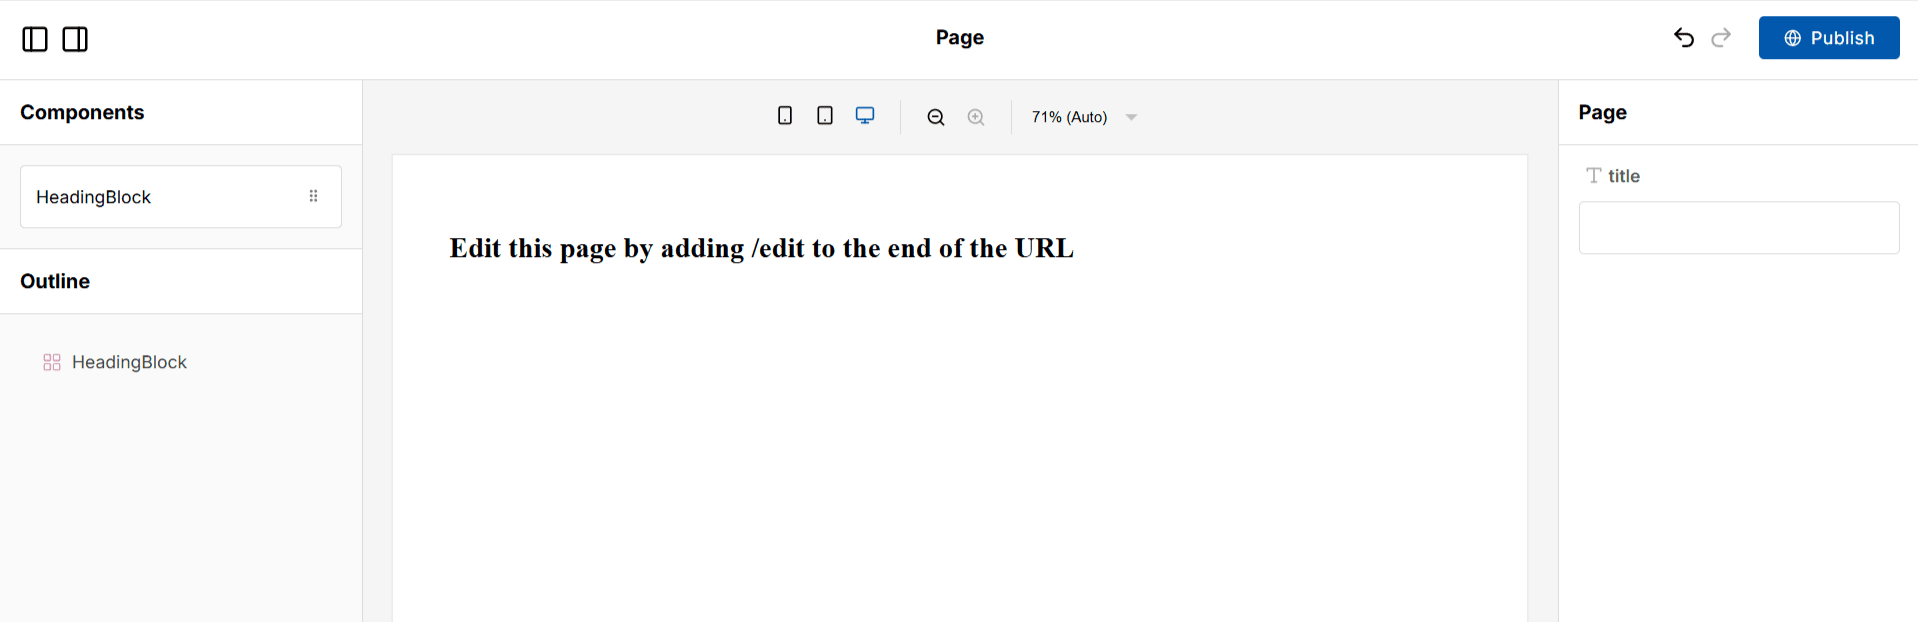
Click on the HeadingBlock in the canvas, modify it’s content to whatever you want and hit Publish in the top-right corner to update your homepage at http://localhost:3000 instantly.
You can also add /edit at the end of any page URL to edit that page visually—whether it already exists or not. This works thanks to the Next.js catch-all route (app/[...puckPath]) that comes pre-configured with the Puck Next.js recipe.
⚠️ Important: By default, Puck’s Next.js recipe saves your page data in the file system and makes all pages editable by anyone. If you plan to deploy this app to production, be sure to check out the recipe documentation for best practices on securing API routes and storing page data in a real database.
Great, now we have our client app and our CMS ready! Next, we’ll connect Contentful to Puck so we can create pages using the content we created in step one.
🔗 3. Connect Puck with Contentful
For this step, we’ll use the @puckeditor/field-contentful package, which provides a Puck field that allows you to select Contentful entries directly inside the editor. This package is a convenience wrapper around Puck’s external field type, handling the Contentful API integration. You can see the source code here.
We’ll also install Contentful’s rich-text-react-renderer package to properly render Contentful’s rich text field data with HTML.
1. Install Dependencies
Start by installing the dependencies.
npm i @puckeditor/field-contentful @contentful/rich-text-react-renderer2. Define an Article Component
Next, add an Article component to allow users to select and display a blog post entry in the pages they’re building. Open /puck.config.tsx, and modify the Puck props type definition and config to define the new component.
//... existing setup

type Props = {
  //... existing props

  Article: {
    // TODO: add the Article props
  };
};

export const config: Config<Props> = {
  components: {
    //... existing setup

    Article: {
      //... TODO: add the component config
    },
  },
};
3. Add the Field to Select Contentful Entries
Inside the Article component definition, use the createFieldContentful function from @puckeditor/field-contentful to create a field that lets users select a blog post from Contentful. Define this field under a data prop in the Article component’s fields.
import createFieldContentful, { Entry } from "@puckeditor/field-contentful";

// Define the expected props for the Article component
type ArticleProps = {
  // Expect contentful entries as article data
  data?: Entry<{ title: string; body: any }>;
};

type Props = {
  //... existing props

  // Replace the empty object definition with the actual type
  Article: ArticleProps;
};

export const config: Config<Props> = {
  components: {
    //... existing setup

    Article: {
      fields: {
        data: createFieldContentful<ArticleProps["data"]>("blog", {
          space: "YOUR-SPACE-ID",
          accessToken: "YOUR-ACCESS-TOKEN",
        }),
      },
    },
  },
};
🔹 Important: Replace YOUR-SPACE-ID and YOUR-ACCESS-TOKEN with your actual Contentful space ID and API token. Storing these in environment variables (.env) is recommended.
4. Render the Selected Blog Post
Once a blog post is selected via the data field, the data prop will be provided to the component’s render function for rendering. Modify the Article’s render function to show the contents of the blog post in the page.
import { documentToReactComponents } from "@contentful/rich-text-react-renderer";

//... existing setup

export const config: Config<Props> = {
  components: {
    //... existing setup

    Article: {
      //... existing field setup

      render: ({ data }) => {
        // If the user selected a blog entry,
        // render it
        return data ? (
          <div
            style={{
              fontFamily: "Arial, sans-serif",
              padding: 32,
            }}
          >
            <h1>{data.fields.title}</h1>
            <hr />
            {documentToReactComponents(data.fields.body)}
          </div>
        ) : (
          <h1>No selected content</h1>
        );
      },
    },
  },
};
Now that everything is set up, navigate to http://localhost:3000/edit and try the following:
- Drag and drop an
Articlecomponent onto the editor - Click the component and select a blog post from Contentful
- The
titleandbodyof the selected blog post should now appear in the editor preview
Reusing Components
Let’s extend the Article component to support different types of content. To demonstrate this, we’ll create a separate About content type, and generalize the Article component so that it works with multiple types.
1. Create the About content type
In Contentful, create an About content type with the same fields as the Blog type:
Title: a required text field for the section titleBody: a required rich text field for the section content
💡 Pro Tip: While you can handle different content type structures using the resolveData API, keeping consistent field names across related content types—like in this example—makes components in Puck instantly reusable. Without any extra implementation, new content types will work automatically with your existing components.
2. Define your own Contentful Client
Previously, the @puckeditor/field-contentful package created the Contentful client internally for us. However, since we now need to retrieve the available content types in our space dynamically, we’ll need to create the client manually and use it for fetching them.
To do this, modify your createFieldContentful setup to explicitly create the Contentful client:
import createFieldContentful, {
  Entry,
  createClient, // Import the client builder
} from "@puckeditor/field-contentful";

// Explicitly create the Contentful client
const contentfulClient = createClient({
  space: "YOUR-SPACE-ID",
  accessToken: "YOUR-ACCESS-TOKEN-HERE",
});

export const config: Config<Props> = {
  components: {
    //... existing setup

    Article: {
      fields: {
        data: createFieldContentful<ArticleProps["data"]>("blog", {
          // Pass the previously created client
          client: contentfulClient,
        }),
      },
    },
  },
};
3. Move the Contentful Field Definition Inside resolveFields
Next, you’ll want to make the fields dynamic, so that the content type passed to the Contentful field definition can be changed based on the value of another field.
To do this, migrate your field definition to the resolveFields API:
// Import the Fields type
import type { Config, Fields } from "@puckeditor/core";

export const config: Config<Props> = {
  components: {
    //... existing setup

    Article: {
      resolveFields: async (data, params) => {
        let newFields: Fields<ArticleProps> = {
          data: createFieldContentful<ArticleProps["data"]>("blog", {
            client: contentfulClient,
          }),
        };

        return newFields;
      },

      //... existing setup
    },
  },
};
4. Let Users Select a Content Type
Now, add a contentType prop to the Article component config, and configure it with a select field that’s populated with a list of all the available content types from Contentful.
When the user changes the value of the contentType select field, pass it to the createFieldContentful call in resolveFields, so the data field now points to a different content type.
//... existing setup

type ArticleProps = {
  data?: Entry<{ title: string; body: any }>;

  // Add a prop for selecting a content type
  contentType: string;
};

//... existing setup

export const config: Config<Props> = {
  components: {
    Article: {
      resolveFields: async (data, params) => {
        // Fetch all available content types from Contentful
        const types = await contentfulClient.getContentTypes();

        let newFields: Fields<ArticleProps> = {
          // Create a dropdown field for selecting a content type
          contentType: {
            type: "select",
            options: [
              { label: "Select a content type", value: "" },
              ...types.items.map((type) => ({
                label: type.name,
                value: type.sys.id,
              })),
            ],
          },
        };

        // If a content type is selected, add an entry picker for it
        if (data.props.contentType) {
          newFields.data = createFieldContentful<ArticleProps["data"]>(
            data.props.contentType,
            {
              client: contentfulClient,
            }
          );
        }

        return newFields;
      },

      //... existing render function
    },
  },
};
Finally, navigate to the editor in the browser, drag and drop an article, choose a content type, and then select the actual entry of that content type you want to render:
📰 4. Edit and Publish your Pages
Now that everything is set up, you can start building and publishing blog posts directly from your app.
For example, if you want to add a new post about, say, the Top 5 Drag and Drop Tools for React, all you need to do is:
- Create a new blog entry in Contentful for it
- Navigate to
http://localhost:3000/top-5-drag-and-drop-libraries-for-react/edit - Drag and drop an
Articlecomponent onto the page - Select the “Blog” content type and pick your new post from the Contentful entries
- Preview the page, tweak the layout if needed, and hit “Publish” in the top-right corner
That’s it! Your new page is now live and accessible at http://localhost:3000/top-5-drag-and-drop-libraries-for-react 🎉
Taking your Page Builder Further
If you want to expand this setup, here are a few ideas to take it to the next level:
- Add a styling library – For larger editors, using a styling library like Tailwind or Emotion can streamline your workflow, reduce boilerplate, and help maintain a consistent design system. Puck even has an Emotion plugin that makes integration seamless if you’re using that library
- Build dynamic blog post listing – While this tutorial covered rendering a single blog post page, you’ll probably want to let users browse all posts. For that, you can apply the same reusability concepts from this tutorial to create a
ContentListcomponent that dynamically lists entries from any content type - Enable content authoring in Puck – Instead of switching between Puck and Contentful, you could integrate Contentful’s Content Management API with Puck’s
resolveDatafunction to allow users to author content directly inside the page builder - Republish the page if the content changes – One limitation of the current setup is that, if you change your content on Contentful, that won’t be reflected on your published Pages. This is because, by default, Puck fetches and copies the content when you first select it in the editor. To fix this, you can use the
resolveDatafunction in the Article component to fetch the latest content from Contentful whenever the component renders. Check out our guide on how to implement this here
🔚 Wrapping up
In this tutorial, I walked you through a simple way to integrate Puck with Contentful, but this is just one of many possible approaches. Since Puck is unopinionated, you have full control over how you structure your page management. Maybe you’d prefer a centralized admin dashboard instead of an /edit URL, or maybe you need to separate your editing and rendering environments entirely across two different applications and domains. It’s completely up to you.
Either way, I hope this guide helped you get started with Puck + Contentful—and maybe even sparked some ideas for your next project.
I’d love to hear what you’re building! Whether you have questions, feedback, or just want to bounce around some ideas, here’s how you can connect with me and the Puck team:
- Found Puck exciting and useful? Show your support with a 🌟 on GitHub—it helps us keep building the tools you love
- Share feedback, explore community plugins, or just hang out with us on Discord 💬
- Follow along for updates, development sneak-peeks, and events on Bluesky and X 👀
And of course, if you have any questions or comments, drop them below. I’m always happy to chat!
Learn more about Puck
If you’re interested in learning more about Puck, check out the demo or read the docs. If you like what you see, please give us a star on GitHub to help others find Puck too!